
Art Effects Glass
Technical Information & FAQ
General Installation Instructions for glass tile
Always wear protective eye wear when working with glass tile. Shards happen & may even get behind regular glasses.
Use care when handling raw edges.
If tile is to be installed over just wall board, a thin scratch coat of thinset is required on board to seal the surface. Allow this to dry for at least 24 hrs. Otherwise the thinset will crack while drying & you will see the cracks through the tile. You will also see rust from wire mesh through the thinset if doing a "mud" installation& from the fasteners used to hold the board in place.
This is not necessary in "Wonderboard", or the newer cement boards, but rust may happen if regular screws are used..
Regular mastic cannot be used in a clear tile installations as it is not UV stabilized & will change color over time. We recommend thinset w/ an add mix to give more flexibility. There are now many new mixes out just for glass tile.
You can use colored thinset behind your glass tile for a new element in the design. We have even used a blend of colors in the thinset.
We suggest that you back-butter the tile when installing it.
Cut the tile with a wet saw that has a new blade. DO NOT USE Manual cutter - it will not work. Again, handle edges with care.
CAUTION: when using a wet saw -
1. Wear protective safety glasses, shards happen.
2. Handle cut edges of tile with care, it is glass. . If shards happen - that is where it will be sharp!
3..Glass tile needs to have a grout line to key it in place. Glass tile does not have pores for the thinset or mastic to grab into. There are no spacing bumps and it is a hand made product & will have slight variances. Therefore, eyeball the spacing since spacers will not work.
When wiping tile surfaces after grouting, use sponge & fresh water, do NOT RUB aggressively. Surface is like a soft glazed ceramic & will scratch. USE NON-SANDED GROUT W/ AN ACRYLIC ADD MIX.
General Instructions for Back Painted glass tile - Mastic may be used.
HOWEVER - Since the color is ONLY a thin back-coating & may be disturbed when moving tile around after placing on wall - Don't Do That
Standard 1/8 grooved tooth on mastic spreader is adequate.
Cut the tile with a wet saw that has a new blade. DO NOT USE Manual cutter - it will not work. Again, handle edges with care.
CAUTION when using a wet saw -1. Wear protective safety glasses, shards happen.
2. Handle cut edges of tile with care, If shards happen - that is where it will be sharp!
3.Cut glass, coating side down. MAKE SURE top of cutting platform is clean with each cut. (Place tile on top of a piece of clean paper for extra insurance to keep grit from scratching it). You don't want to scratch the backing either. This will also prevent coating from chipping if it was cut coating side up.
4.Glass tile needs to have a grout line to key it in place. Glass tile does not have pores for the thinset or mastic to grab into. Coated tile is especially subject to peeling if not properly installed. The grout lines hold it in place, the coating doesn't. There are no spacing bumps and it is a hand made product & will have slight variances. Therefore, eyeball the spacing since spacers will not work.
5 DO NOT PLACE TILE, REMOVE & RE INSTALL. THIS TILE HAS A COATING THAT WILL BE REMOVED IF TILE IS SET THEN MOVED. YOU CAN'T DO THAT. PLACE TILE, & ADJUST SLIGHTLY ONLY.
When wiping tile surfaces after grouting, use sponge & fresh water, do NOT RUB aggressively. Surface is like a soft glazed ceramic & may scratch. USE NON-SANDED GROUT W/ AN ACRYLIC ADD MIX.
Any Questions, Please ask. No guarantees on haphazard installations w/ instructions not followed.
1. For anything that we have already designed, sinks & tile - 2-3 wks, depending on what else we have in the furnaces & kilns.
As soon as we get the deposit for your order, we schedule your job in & let you know when you can expect your project. Some times of the year are busier than others, so allow the standard 4-8 weeks. We cannot do last minute orders.
2. For custom designed orders, allow 4 weeks of design time, to allow for samples to be mailed back & forth to you & us. We can only do so much with e-mailed photos.
Once you make your decision & send us back the contract & deposit, we schedule in your job. Again, Some times of the year are busier than others, so allow the standard 4-8 weeks for product production. We cannot do last minute orders.
Ordering Process:
1. Once you have decided on all of the details, you send in you order form with 2 checks or money orders - the price plus 10% for shipping & packing divided by 2. We deposit the 1st check & schedule you in. then deposit the 2nd when your order is done. & we mail it out. If the shipping is more, you send us the difference, if it is less, we refund it to you.
2. Everything is made to order & there are no returns.
PRICING:
1. Because everything is made to order, we have general pricing. Our tile starts at $30/sq ft, (4X4 - 3.34 each) sinks start at $500.00 we can give you specifics on the items you are interested in.
2. We have printed catalogs available for you to purchase, and design folios for specific patterns or styles we can e-mail or mail to you.
Tech. info.
1. All of our products are annealed longer than required to relief the stresses inherent in the process of creating it.
2. Glass is slippery in it's untextured state. Therefore we do not advise you use it for large floor installations. If it does have a surface texture, it is still slippery when wet, as are many other flooring materials.
3. We periodically do impact testing on all of our products. They are not likely to break under normal use.
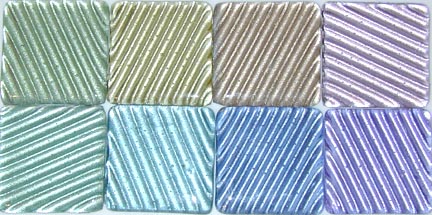
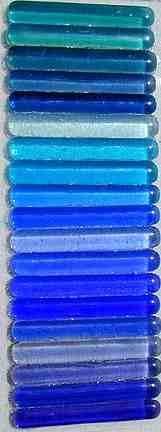
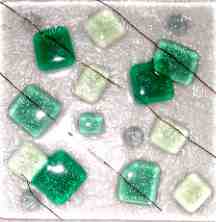
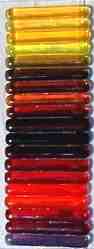
Basic glass colors, plus a bluish clear & a very clear. Sample sets are available
Back paint can either be metallic as above, or just color.
Easiest way to pick this way of coloring is from our color deck- $20.each or send us a paint chip & we can come close to it. Be aware that the back color will be effected by being seen through the glass, & what kind of light you are looking at it in.